Winter White Peacock Wreath DIY

Is it weird that wreath-making is something I look forward to? I’ve been itching to make a new wreath for a while. I have a fall wreath, a spring/summer wreath, and I had an evergreen wreath (given to me, not made) that was up for Christmas. Well, Christmas is over, and after using the evergreen wreath for two Christmas seasons in a row (something you’re apparently not supposed to do with fresh evergreen??? It was kind of faded haha), it was time for a new wreath.

Also, I’m convinced my neighbors down the hall are trying to copy/one up my door decorating. That’s a post for another day, but I think by now we’ve all realized I get a little competitive about domestic things. Blame it on my total lack of interest in sports. So I had to make a new wreath that they wouldn’t be able to copy.

isteph215.wordpress peacock wreath

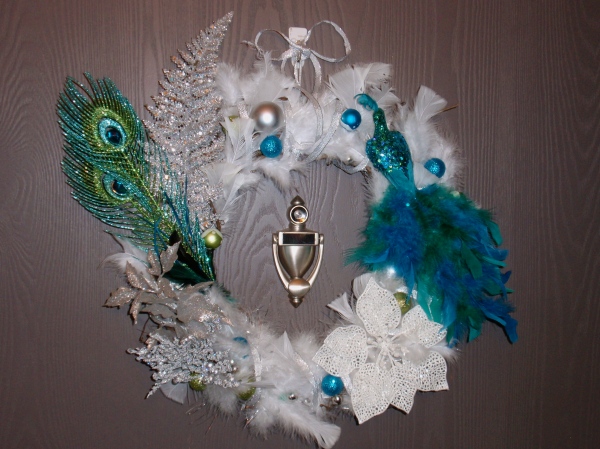
Boom. Winter peacock wreath.

I wanted something with a lot of white, silver, and glitter. Because those things are wintery to me, and this wreath will be up until I hang my spring/summer wreath. I was brainstorming via Pinterest and decided that I really liked a blue/white combo for winter. So I perused my current craft supplies, and I had a bunch of mini glittery ornaments. I picked out the blue and green ones and from there it was an easy leap to peacock. Easy leap for me, maybe no one else thinks blue + green = peacock!

I was so excited to make my wreath that I forgot to take pictures of the process (SORRY!!!), but the rest of the supplies came from Micheal’s craft store. I lucked out and a ton of the glittery things – including that awesome peacock bird and the feather – were on clearance.

Essentially, it’s one of those twig/grapevines wreath forms with a ton of white feathers inserted into the twigs, some silver ribbon wrapped around that, and some glittery silver floral pieces. I hot glued the floral pieces, the bird, and the small ornaments on.

Total cost of my wreath: Under $20.

Let’s take a closer look. I know you’re all dying to check out that bird.

peacock wreath closeup isteph215.wordpress

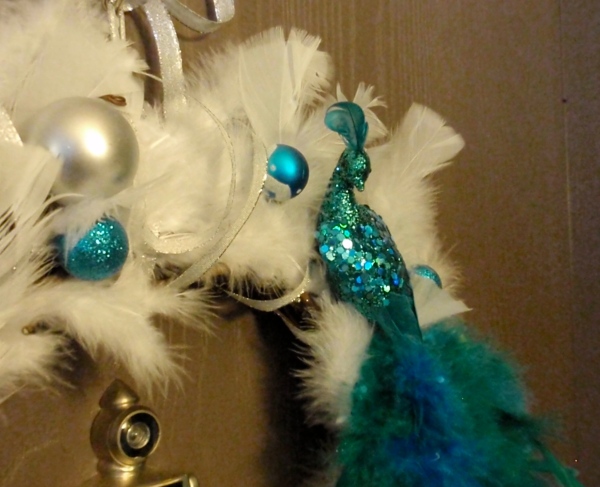
And the feather on the side.

peacock wreath feather closeup

Dear neighbors, let’s see you try to copy this wreath.

❤ Steph

“Put a bird on it” Autumn Wreath

I’ve kind of got an owl theme going on.

For the most part it stems from the fact that I put an embargo on cat-themed items when I got my cat. As a single girl with a cat, I had to put my foot down. I will not be a crazy cat lady. So people started giving me owl-themed items instead. And owls are adorable, so I’m okay with that.

Which brings me to this.

owl wreath

I LOVE fall. I love the smell and the crisp edge to the air. I delight in crunching leaves under my feet and picking apples with family or friends. Breaking out my sweaters, scarves, and boots makes me positively giddy. And don’t even get me started on the dessert. Nothing smells better than apple crisp in the oven, or trying out a new pumpkin recipe.

So to celebrate fall, I made a new wreath for my door. Wreathes are fun because you can really put whatever you want on them and make it very custom to you.

Step 1: Hit up the HobLobbs. This is my new gangster name for Hobby Lobby. Just go with it. My shopping list went something like this:

  • foam wreath form
  • glue gun (because my friend moved to Chicago and took mine with her!)
  • red, orange, brown felt
  • beads, feathers, stuff???

I already had the little owl guy, I bought him for my last wreath but he totally didn’t match. So he had to wait. You will also need some yarn, but I already had it from my spring/summer wreath.

Step 2. Wrap it up. I didn’t take any pictures of this part, because it’s mind-numbingly boring and the SassCat kept trying to eat my yarn and I didn’t have enough hands to wrap yarn, block her, and take photos. Basically, pop in a movie, or catch up on your Hulu queue, and wrap yarn around the wreath form until you can’t see foam anymore. So fun.

Step 3: Come up with a general idea of how stuff is going to fit on the wreath. I’m a fan of pre-planning, because I don’t do enough of it. For me, there was also a step that involved cutting leaf shapes out of felt, but that’s optional depending on what you want on your wreath.

Step 4: Glue! I think this one is pretty self-explanatory.

Here are the various materials I ended up with and some more shots of the wreath.

Modular Felt Coasters + Felted Flower Wreath

I’m going to say it right now. Most of my craft projects are super girly.

You’ve been warned.

I found this modular felt coaster tutorial over on How About Orange.

The modern, graphic look of them really appealed to me, and I had a TON of felt leftover from making my spring/summer wreath. So I thought I’d try these coasters out. There is also a trivet version of the tutorial, which is what I really wanted to make, but I thought I should start small. I actually have no need for new coasters, due to a bad habit of snitching coasters from every bar/pub I visit. It’s like a scrapbook of places I’ve been.

Things I learned from my felt coaster project:

  1. Felt is surprisingly hard to slice?
  2. I really need to invest in new X-acto knife blades.

Here they are in action. They sit on my coffee table now, and I’ve corralled all the bar coasters into a pretty box that used to hold notecards. The box sits next to the pretty coasters, in case I should ever need more than two coasters at once.

And that’s a pint glass that I got for two dollars at a dive bar in the town I grew up in. You can’t get Yuengling in the Midwest (it’s only distributed to 13 or so states, pretty much all East Coast), but it’s a nice craft beer.

ImageImage

FYI, one sheet of felt makes two coasters.

And here’s a couple pics of the wreath I made (the original project this felt was for).

ImageImage